# minAreaRect函数
# 1.背景
在做旋转物体检测时,通常期望得到对象的带角度最小面积包围矩形,如下图对卫星图像航空母舰的检测:
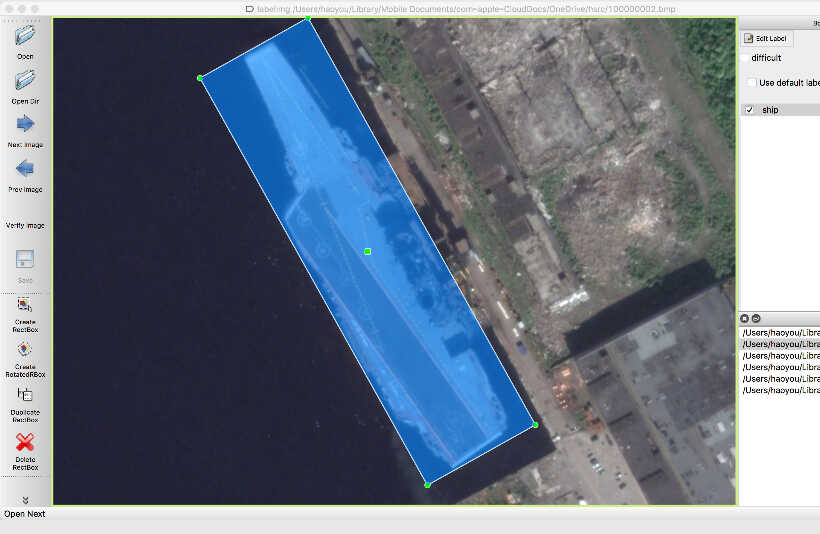
若已经获取了对象的轮廓,可以通过OpenCV中的minAreaRect方法获取对象的最小面积包围框。
# 2.minAreaRect 函数
RotatedRect cv::minAreaRect(InputArray points)
入参
- points 是点的集合,如轮廓
返回值
RotatedRect,带角度的旋转矩形框 (opens new window),其值形如(center(x,y), (width, height), angle of rotation )
center(x,y), (width, height)分别是旋转矩形框中心的坐标和矩形的宽和高。值得注意的是最后一个元素angle of rotation旋转角的定义。旧版本和新版本的定义有些许的差异,具体是以4.5.1为分界,小于4.5.1使用了旧的定义方法,4.5.1及之后都采用了新的旋转角定义方法。具体可见OpenCV GitHub Issue (opens new window)。新旧版本旋转角度的定义如下【图片来自于 mmRotate】:

对于新版的定义,以旋转矩形框x最小,y最小的点为旋转点,以x轴正方向开始顺时针旋转碰到旋转矩形框第一条边时所转过的角度,旋转重合的第一条边算做width,另一条算做height,其取值范围为y最小,x最小的点为旋转点, 逆时针方向旋转碰到的第一条边与x轴所成的角,其取值范围为
# 3.以新版为例
img = np.zeros((300, 500), dtype=np.uint8)
contour = np.array([[20, 100], [100, 20], [320, 220], [380, 290]], dtype=np.int32)
cv2.drawContours(img, [contour], -1, 255, cv2.FILLED )
rotRect = cv2.minAreaRect(contour) # 返回值 (center(x,y), (width, height), angle of rotation )
print(rotRect)
rect = cv2.boxPoints(rotRect).astype(np.int32)
img = cv2.cvtColor(img, cv2.COLOR_GRAY2BGR)
cv2.drawContours(img, [rect], -1, (0,0, 255), 4)
cv2.imwrite("img.png", img)
# >>>
# ((225.22630310058594, 147.20277404785156), (407.0626525878906, 108.09146881103516), 27.8240966796875)
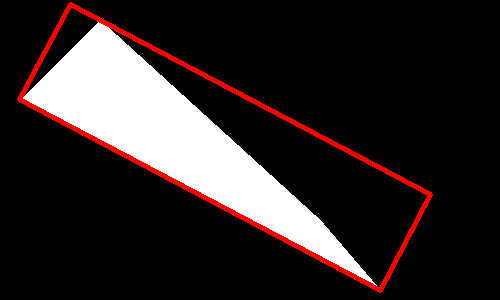
cv2.minAreaRect函数的返回值是旋转矩形框中心点的坐标和框的宽高,想要在图像画出旋转矩形框还需要将其转成4个顶点的形式,使用boxPoints即可求出四个顶点的坐标。此外还可以手动的来求,也比较简单,假设以旋转点为原点,矩形框width的边为新的x轴建立新的坐标系,则和原图像坐标系之间是只有旋转变换,求出其旋转矩阵即可完成点的变换,可参考 (opens new window),代码如下,可见结果很接近(计算精度存在误差):
def rotate_oc_points(bbox):
    xc, yc, w, h, ag = bbox[:5]
    ag = ag/180*np.pi
    wx, wy = w / 2 * np.cos(ag), w / 2 * np.sin(ag)
    hx, hy = -h / 2 * np.sin(ag), h / 2 * np.cos(ag)
    p1 = (xc - wx - hx, yc - wy - hy)
    p2 = (xc + wx - hx, yc + wy - hy)
    p3 = (xc + wx + hx, yc + wy + hy)
    p4 = (xc - wx + hx, yc - wy + hy)
    return np.array([p1, p2, p3, p4], dtype=np.int32)

img = np.zeros((300, 500), dtype=np.uint8)
contour = np.array([[20, 100], [100, 20], [320, 220], [380, 290]], dtype=np.int32)
cv2.drawContours(img, [contour], -1, 255, cv2.FILLED )
rotRect = cv2.minAreaRect(contour) # 返回值
rect = cv2.boxPoints(rotRect).astype(np.int32)
print(f"by boxPoints:\n {rect}")
rect = rotate_oc_points([*rotRect[0], *rotRect[1], rotRect[2]])
print(f"by get_pnts:\n {rect}")
img = cv2.cvtColor(img, cv2.COLOR_GRAY2BGR)
cv2.drawContours(img, [rect], -1, (0,0, 255), 4)
cv2.imwrite("img.png", img)

# >>>
# by boxPoints:
#  [[ 19  99]
#  [ 70   4]
#  [430 194]
#  [380 290]]
# by rotate_oc_points:
#  [[ 70   4]
#  [430 194]
#  [379 289]
#  [ 19  99]]
# 4.C++中的使用
cv::Mat rect;
cv::boxPoints(rot_rect, rect);
std::cout << "Appearance Rectangle Points: " << rect << std::endl;
std::vector<cv::Point>rect_pts;
for(int i = 0; i < rect.rows; i++) {
    rect_pts.push_back(cv::Point(rect.at<float>(i, 0), rect.at<float>(i, 1)));
}
for(auto &p : rect_pts) std::cout << p << std::endl;